Mobile Screen
How to change mobile screen
Cracked Screen
Phone Screen Replacement
Learn how to change mobile screen
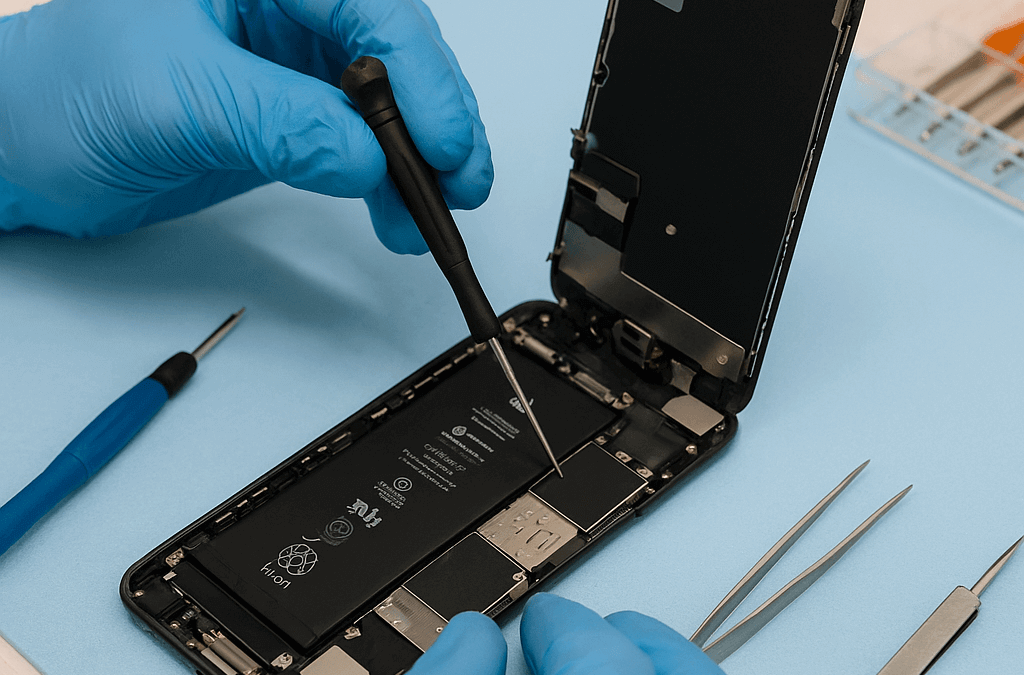
🔧 Professional Mobile Screen Replacement Process
🧰 Tools & Equipment Needed
-
Plastic spudger / pry tools
-
Pentalobe/Torx/Phillips screwdrivers (depending on device)
-
Suction cup
-
Tweezers
-
Heat gun or heating pad
-
Anti-static wrist strap (optional but recommended)
-
Isopropyl alcohol (90% or higher)
-
Adhesive strips or glue (T-7000/B-7000 for glass bonding)
-
New screen assembly (compatible & original/OEM if possible)
-
Magnetic mat or screw organizer
🧼 1. Prepare the Workspace
-
Work on a clean, static-free surface.
-
Organize your tools and parts.
-
Power off the device completely.
-
Use anti-static gloves or wrist straps to prevent ESD damage.
📲 2. Remove the Back Cover (if required)
-
For phones like Samsung or newer Androids, gently heat the back panel using a heat gun (60–80°C) for a few seconds.
-
Use a suction cup to lift a corner, then slide a plastic pick around the edge to separate adhesive.
🔋 3. Disconnect the Battery
-
Open the phone carefully and locate the battery connector.
-
Unscrew the shield and disconnect the battery using a plastic tool (never metal).
🖥️ 4. Detach the Screen Assembly
-
Unscrew and remove the display shield (usually near the top).
-
Disconnect the display flex cables and digitizer.
-
Heat the front if the glass is glued (especially in non-modular phones).
-
Slowly lift off the screen using a suction cup and plastic picks.
🔍 5. Clean and Inspect
-
Clean any old adhesive with isopropyl alcohol.
-
Check for damaged components (e.g., front camera, fingerprint scanner).
-
Transfer necessary components to the new screen (e.g., earpiece, sensors).
🧩 6. Install New Screen
-
Attach the new screen temporarily and connect its cables.
-
Reconnect the battery and test the display before sealing it (touch, brightness, camera, sensors).
-
If all is functional, power off again.
🪛 7. Seal and Reassemble
-
Apply fresh adhesive around the edges.
-
Fit the screen snugly into place.
-
Reassemble the device by reversing the disassembly steps.
-
Let adhesive cure for a few hours if glue is used.
✅ 8. Final Test and Quality Check
-
Turn on the phone and check:
-
Touch responsiveness
-
Brightness and display color
-
Front camera/sensor functionality
-
No gaps or loose fitting
-
-
Wipe down the phone and return to the customer with warranty (if provided)
🛡️ Pro Tips
-
Always use high-quality screens and adhesives.
-
Avoid metal tools on internal components.
-
Keep screws organized — wrong screw in wrong place can damage motherboard.
-
Wear gloves to avoid leaving fingerprints under the screen.

+91 7307802120
admin@pro-fixtech.com